

This is a paid feature. See plans and pricing, or talk to sales about an enterprise plan.
How To Invite a User To Your Platform
Step 1: Click on Users in the platform admin Step 2: Navigate to the upper right and click the invite button Step 3: Add the invitee’s email and assign them a role Step 4: Click InviteHow To Edit User Role
Step 1: Go to Users in the platform admin Step 2: Click on the 3 dots to the right of the user you want to edit Step 3: Click on Edit
Default Roles
Activepieces comes with four standard roles out of the box. The table below shows the permissions for each role:
Custom Roles
If the default roles don’t fit your needs, you can create custom roles with specific permissions.1
Navigate to Project Roles
Go to Platform Admin → Security → Project Roles
2
Create a New Role
Click Create Role and give it a name
3
Configure Permissions
Select the specific permissions you want to grant to this role
Deactivate & Delete User:
Step 1: Click on Users in the platform admin Step 2: Click on the 3 dots to the right of the user you want to delete or deactivate Step 3: Click on either Delete or Deactivate depending on what you want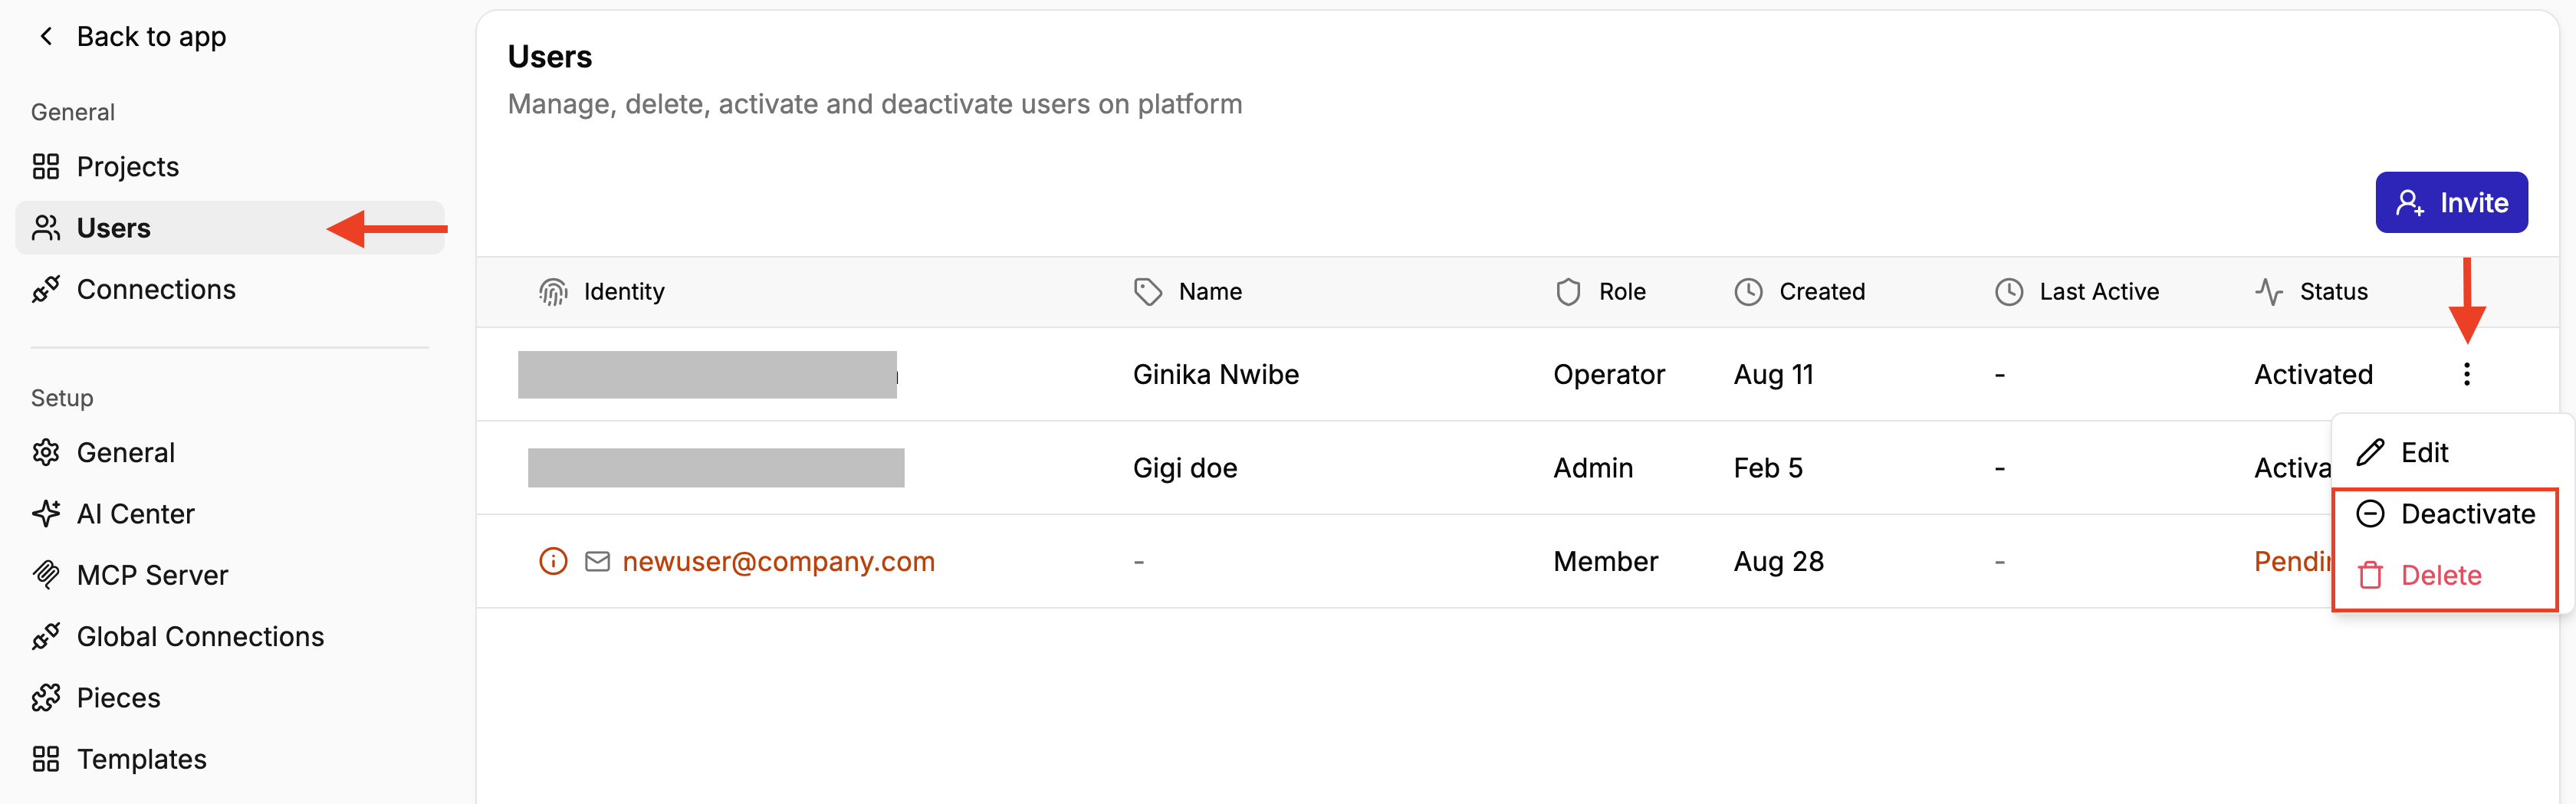 NB:
NB:
- If you Deactivate a user, they will lose access but won’t lose all their data. You can always activate them again.
- However, if you Delete a user, all their data will be deleted as well.