

Overview
Single Sign-On (SSO) allows your team to authenticate using your organization’s existing identity provider, eliminating the need for separate Activepieces credentials. This improves security, simplifies user management, and provides a seamless login experience.Prerequisites
Before configuring SSO, ensure you have:- Admin access to your Activepieces platform
- Admin access to your identity provider (Okta, Microsoft Entra ID, JumpCloud, or any SAML 2.0 provider)
- Access to your company domain’s DNS settings, to verify the domain
The Authentication page
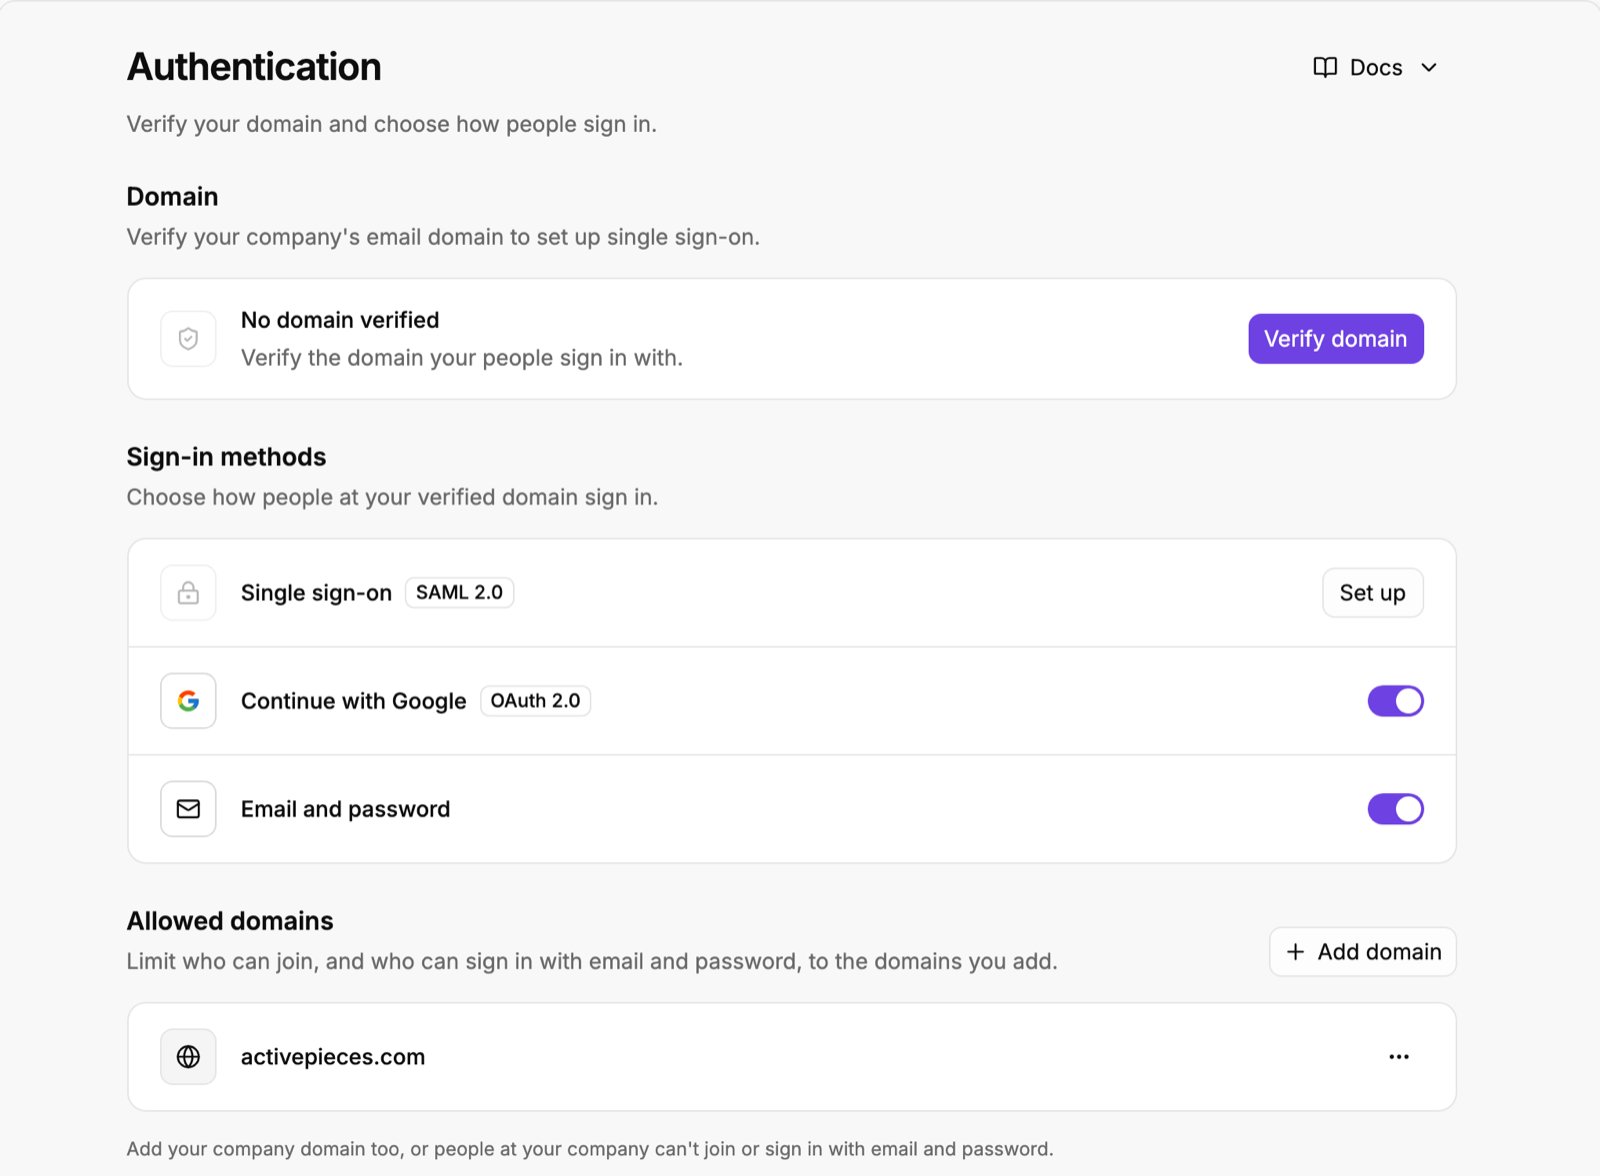
Go to Platform admin → Security → Authentication. The page has three sections:- Domain: the company domain your people sign in with.
- Sign-in methods: single sign-on (SAML 2.0), Continue with Google, and email and password.
- Allowed domains: the email domains allowed to sign in with email and password.
Verify your domain
Single sign-on needs a verified company domain (for exampleacme.com).
Enter the domain
Add the TXT record
Verify DNS
Set up SAML
Under Sign-in methods, click Set up next to Single sign-on (or Manage once it’s connected). The setup has two steps:- SSO Domain: verify your domain, or confirm the one you already verified.
- SAML 2.0:
- Copy these into your identity provider: the Single sign-on URL and the Audience URI (SP Entity ID), which is
Activepieces. - Paste these from your identity provider: the IDP Metadata (the metadata XML, or a metadata URL) and the IDP Certificate.
- Copy these into your identity provider: the Single sign-on URL and the Audience URI (SP Entity ID), which is
disable to confirm. This deletes the SAML connection but keeps your verified domain, so you can connect again later. As with removing the domain, it’s blocked while single sign-on is the only way to sign in.
Signing in with SAML on Cloud
On the cloud sign-in page, Sign in with SAML asks for the organization’s domain. Entering acme.com sends the person to the identity provider of the platform that verified acme.com. The signed-in email must be at that domain.
Google and email and password
Turn Continue with Google and Email and password on or off under Sign-in methods. Each change asks you to confirm. You can’t turn off the last sign-in method that works: turn on another one first. On a self-hosted server, Google only counts once it’s set up. On self-hosted instances, the Google button only appears onceAP_GOOGLE_CLIENT_ID and AP_GOOGLE_CLIENT_SECRET are set. See Google sign-in on self-hosted.
Allowed domains
Allowed domains limits sign-in to email addresses at the domains you list. Add your company domain too, or people at your company are refused.- Cloud: the list applies to email and password sign-in.
- Self-hosted Enterprise: the list also applies to anyone creating an account, with any sign-in method.
Supported SSO Providers
Activepieces supports multiple SSO providers to integrate with your existing identity management system.Access Google Cloud Console
Create OAuth2 Credentials
Configure Redirect URI
<your Activepieces URL>/redirect to the Authorized redirect URIs. If you set AP_INTERNAL_URL, use that URL instead.Set the environment variables
AP_GOOGLE_CLIENT_ID and AP_GOOGLE_CLIENT_SECRET to the client’s ID and secret, then restart Activepieces. See environment variables.SAML with Okta
Create New Application in Okta
Select SAML 2.0
Configure General Settings
Configure SAML Settings
- Single sign-on URL: Copy the Single sign-on URL from step 2 of the SAML setup
- Audience URI (SP Entity ID): Enter
Activepieces - Name ID format: Select
EmailAddress
Add Attribute Statements
Complete Setup in Okta
Export IdP Metadata
Configure Activepieces
- Paste the IdP Metadata XML into the corresponding field
- Copy the X.509 Certificate from Okta and paste it into the IDP Certificate field
Save Configuration
SAML with Microsoft Entra ID (Azure AD)
Create an Enterprise Application
Configure SAML Single Sign-On
Set Identifier and Reply URL
- Identifier (Entity ID):
Activepieces - Reply URL (Assertion Consumer Service URL): paste the Single sign-on URL from step 2 of the SAML setup
Configure User Attributes & Claims
Copy the Federation Metadata
Copy the Signing Certificate
-----BEGIN CERTIFICATE----- / -----END CERTIFICATE----- markers) into the IDP Certificate field in Activepieces.Assign Users
Save Configuration
SAML with JumpCloud
Create New Application in JumpCloud
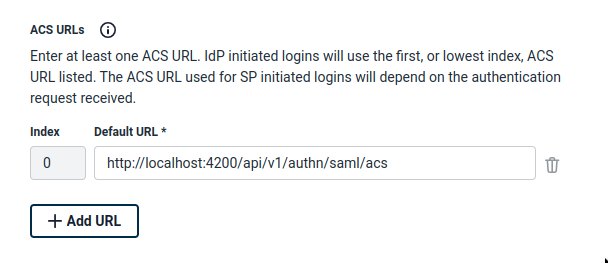
Configure ACS URL
Configure SP Entity ID
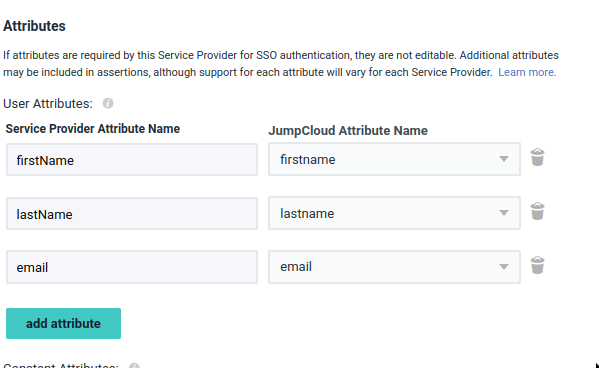
Activepieces.Add User Attributes
Enable HTTP-Redirect Binding
HTTP-Redirect binding by default. You must enable this option.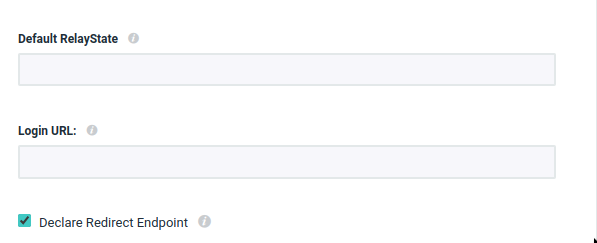
Export Metadata
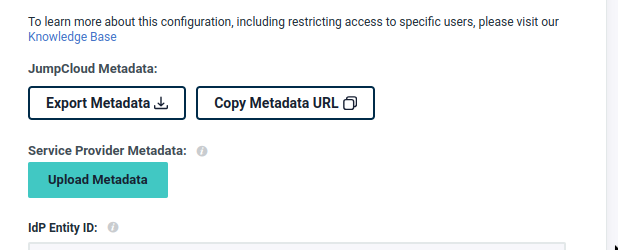
Configure IdP Metadata in Activepieces
Configure Signing Certificate
<ds:X509Certificate> element in the IdP metadata and extract its value. Format it as a PEM certificate:Assign Users to Application
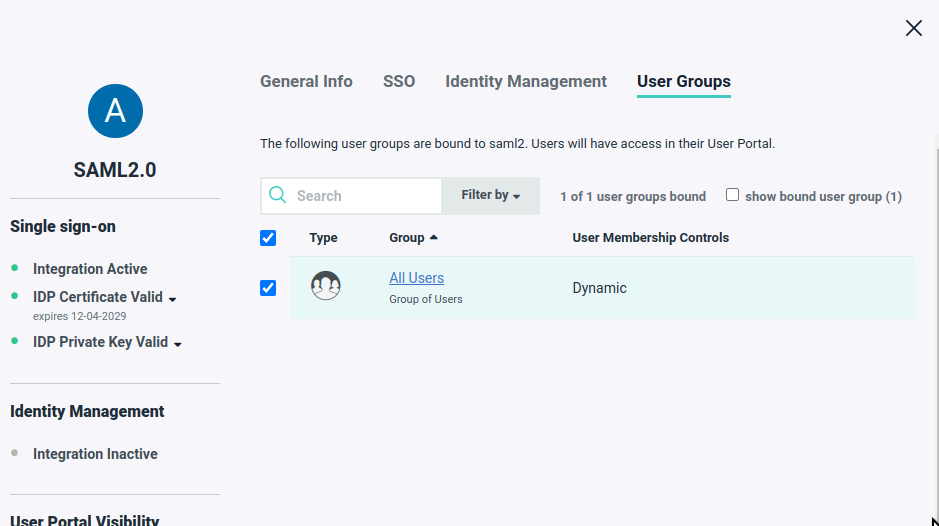
Save Configuration
Troubleshooting
Users cannot log in after SSO configuration
Users cannot log in after SSO configuration
- Verify the redirect URL is correctly configured in your identity provider
- Ensure users are assigned to the application in your identity provider
- Check that the user’s email is at your verified domain
- If you use allowed domains, check that the user’s domain is on the list
SAML authentication fails
SAML authentication fails
- Confirm the IdP metadata is complete and correctly formatted
- If you pasted a metadata URL, make sure it is publicly reachable (Activepieces fetches it server-side)
- Verify the signing certificate is properly formatted with BEGIN/END markers
- Ensure all required attributes (firstName, lastName, email) are mapped
HTTP-Redirect binding error (JumpCloud)
HTTP-Redirect binding error (JumpCloud)
- Enable the HTTP-Redirect binding option in JumpCloud
- Re-export the metadata after enabling the binding
- Verify the binding appears in the exported XML